Developing Your Skills and Avoiding Common Mistakes
Travel photography is an incredible way to capture the essence of a destination, telling stories through images that evoke the sights, sounds, and emotions of your journeys. Whether you're exploring bustling city streets, serene landscapes, or vibrant cultural festivals, mastering the art of travel photography can help you create memories and experiences that last a lifetime. This step-by-step guide will walk you through practical exercises, tips, and techniques to take your travel photography to the next level, complete with stunning examples and detailed explanations on how to achieve similar results.
1. Understanding Your Equipment
Before you set out on your travels, it's essential to be familiar with your camera and its settings. (This CAN NOT be under-stated. I know it sounds silly - but practice, practice, practice!!). Whether you're using a DSLR, mirrorless camera, or even a smartphone, understanding how to control your device will dramatically improve your photos. You never know when you may need to know how to capture a close-up of an animal, a macro of lichen, or the longer exposure of the northern lights. Always have the process in the back of your mind so you’re ready. (Now, let’s be honest - you don’t have to be a pro - you can take a bunch of bad pictures practicing - and then get THE SHOT and LOOK like a pro!!!).
- Practice Manual Mode: Spend time learning how to shoot in manual mode. Understand how aperture, shutter speed, and ISO work together. Experiment with different settings in various lighting conditions to see how they affect your images.
- Invest in the Right Lenses: For travel photography, a versatile zoom lens (such as a 24-70mm) can be a great all-rounder, allowing you to capture wide landscapes as well as tighter shots. A prime lens, like a 50mm or 35mm, can offer superior image quality and perform well in low light. For animals, and long distance shots, I like the 70-200 mm.
- Don’t Overpack Gear: It’s tempting to bring all your gear, but traveling light helps you stay mobile and less conspicuous. Choose versatile lenses and consider a tripod if you plan on low-light or long-exposure shots. I have so much gear. Seriously! If I packed it all, I couldn’t move! So I probably don’t always pack what I should - thank goodness for editing (we’ll see that farther on.)
2. Research and Plan Ahead
Great travel photography often begins before you even arrive at your destination. A bit of research can go a long way in helping you capture the best shots.
- Scout Locations: Use resources like Instagram, Pinterest, and photography websites to find popular spots as well as hidden gems. Note the times of day when these locations look their best, such as golden hour for soft, warm light or blue hour for moody, twilight scenes.
- Understand the Culture: Knowing the local customs and traditions can help you capture more authentic and respectful photos. For example, in some cultures, it's important to ask permission before photographing people.
- Check the Weather: Weather can dramatically affect your photos, from the mood of your shots to the technical settings you'll need. Plan for early mornings or late afternoons to avoid harsh midday sun.
Okay - let’s be honest - I’m a retired project planner gone photographer. I LOVE PLANNING. I met someone who then introduced me 4 times because of a 200 page Switzerland travel itinerary that I planned. (Honestly, I wish it had been about my photography - but they didn’t know I did photography!!!). What they did know is …. If you want to go somewhere - Lisa is the planner! PLAN, PLAN, PLAN. Ladies if your husband complains (like mine), just show him the itinerary and say you researched it. Works every time!!!
3. Mastering Composition
Composition is the cornerstone of compelling travel photography. By paying attention to how you frame your shots, you can turn ordinary scenes into extraordinary images.
- Rule of Thirds: Divide your frame into a 3x3 grid and position key elements along these lines or at their intersections. This technique creates balance and draws the viewer’s eye naturally into the image.
- Leading Lines: Use roads, paths, rivers, or architectural lines to lead the viewer’s eye through the photograph. Leading lines create depth and guide attention towards the main subject.
- Framing: Look for natural frames within your environment, such as arches, windows, or foliage. Framing adds context and layers to your photos, making them more visually interesting.
- Use Negative Space: Don’t be afraid of empty space in your images. Negative space can emphasize your subject and create a more powerful image.

Rule of thirds - can’t go wrong. Follow it and the shots will be amazing. Play around with it too! Honestly - I love just looking from different directions and seeing what “speaks to me”. Yes, that sounds silly - but trust me - you will thank me later. When you hit the post-processing phase the picture that you thought you wouldn’t love … is usually your favorite. (I don’t know why that is?!!)
4. Capturing People and Portraits
Photographing people can add a human element to your travel stories, offering a glimpse into the local culture and way of life.
- Be Respectful: Always ask for permission before taking someone’s photo, especially in cultures where privacy is valued. Learn a few key phrases in the local language to ask politely.
- Candid Moments: Sometimes, the best portraits are those captured candidly. Observe your subjects and wait for moments when they are naturally engaged in their environment.
- Focus on the Eyes: When taking portraits, ensure the eyes are in sharp focus. The eyes are the most expressive part of a person and can convey deep emotion in your photographs.
- Use Natural Light: Whenever possible, use soft, natural light for portraits. Avoid direct sunlight, which can create harsh shadows. Overcast days provide even, diffused light that is flattering for portraits.
Personally, I only do this for IG, FB, and Scrapbooking. For my large art - I don’t want people in it - I want landscapes. The portrait wall is for people! 🤭
5. Lighting Techniques
Light is the most crucial element in photography. Mastering lighting techniques will help you create mood and depth in your travel photos.
- Golden Hour: The period shortly after sunrise and before sunset is known as the golden hour. The light is soft, warm, and ideal for landscapes, portraits, and cityscapes.
- Blue Hour: Just before sunrise and after sunset, the sky takes on a deep blue hue. This time is perfect for capturing city lights and creating a moody atmosphere.
- Backlighting: Shooting into the light source can create stunning silhouettes and highlights. Position your subject between the camera and the sun, then adjust your exposure to capture dramatic backlighting.
- Use Shadows Creatively: Shadows can add intrigue and dimension to your photos. Look for interesting shadow patterns, especially in architectural photography or street scenes.
Again … Practice, practice, practice!!! You can’t always be everywhere at the perfect time, so you sometimes have to improvise. Use the sun and shadows to your advantage. Play with it - and find your style.
6. Practical Exercises to Hone Your Skills
To improve your photography skills, it’s essential to practice regularly. Here are some exercises you can try on your travels:

- 30 Shots Challenge: Choose one subject and take 30 different photos of it from various angles, distances, and settings. This exercise forces you to get creative and explore all possible perspectives. Try it - you’ll be glad you did!!
- One Lens Day: Limit yourself to using just one lens for an entire day. This constraint encourages you to think differently and make the most of your equipment. I prefer the 24-70mm lens for that. It’s such a versatile lens that it can be your “one stop shop” for your camera lens.
- Shoot in Black and White: Switch your camera to black and white mode. Without the distraction of color, you’ll focus more on composition, contrast, and textures. (I don’t do this - I do it all in color then adjust in photoshop when I get to the editing process. Sometimes when I go back and look at these I’m amazed at the deeper beauty when you remove the color - so cool!)
- Daily Photo Journal: Set a goal to take one meaningful photo every day of your trip. This practice helps you stay observant and mindful, always looking for that perfect shot. (Now I know what you’re thinking … only one???? Seriously - how can you do only one???? One MEANINGFUL shot. You may take many pictures of that shot - If you’ve gone thru the steps above and have planned properly you’ll be lucky to only have 20 pictures per day - mine is usually like 200!! Let’s be honest - they are DIGITAL - which means it’s easy to delete. I remember when I got my first digital camera and my husband was like … now you won’t have to take so many pictures! (Silly man - I more than quadrupled the number of pictures I took because …. HELLO TECHNOLOGY - why not use the tools that the technology community has given us!!)
7. Avoiding Common Mistakes
Even seasoned photographers make mistakes, but being aware of common pitfalls can help you avoid them.
- Overediting: It’s easy to get carried away with editing tools, but overediting can make your photos look unnatural. Aim for subtle adjustments that enhance, rather than overpower, your images. I hate editing. Like … HATE IT! I really just want my pictures to be what my eye is seeing. I understand that sometimes I need to adjust my brightness etc. However, I am NOT a fan of editing out twigs or leaves etc. So I don’t (usually). I look at it as - this is what my eye saw. This was MY EXPERIENCE! Now, that being said … I sometimes do have to remove them when they take away from a picture. Painful story … I did a wedding shoot for my friend and got them back and there was a fly that apparently loved the groom’s jacket. So he was edited and removed!
- Ignoring the Background: A cluttered or distracting background can ruin an otherwise great photo. Pay attention to what’s behind your subject and adjust your angle or position if needed. YES YES YES - focus on the subject!!!
- Shooting Everything at Eye Level: Don’t be afraid to change your perspective. Get low to the ground, climb higher, or tilt your camera for a more dynamic shot. Step out of that comfort zone. Squat. Put your camera on a rock. Think out of the box.
8. Post-Processing Tips
Post-processing is an essential part of digital photography. It’s where you can fine-tune your images and bring out their full potential.
- Editing Software: Tools like Adobe Lightroom and Photoshop offer powerful editing capabilities. Familiarize yourself with basic adjustments like exposure, contrast, and saturation. I’m a huge PHOTOSHOP fan. Yes, I have Lightroom, but I don’t want large edits - so my preferred software is Photoshop.
- Keep It Natural: The goal of editing should be to enhance your photos, not transform them. Aim for a natural look that stays true to the original scene. Keep it what you SAW - not necessarily what you were hoping you saw.
- Organize Your Photos: Keep your photo library organized by date, location, or subject. Tagging and cataloging your images will save you time when you want to revisit your work later. I wish I was better at this. I try. I really do. But ….. let’s be transparent and honest here - I suck at it! I actually arrange my photos by YEAR / MONTH / TRIP and then sometimes I break it down by DAY / LOCATION. So when I know I saw a lake in Banff - I know where to start culling thru to find the photo.
- Backup Your Files: Always back up your photos in multiple locations, such as an external hard drive and cloud storage, to avoid losing your precious memories. YES YES YES YES YES YES YES!!!!!!!!!! i have so many backups of my photos and I always think I need more … because …. What if……
9. Inspiration and Continuous Learning
Travel photography is a journey of continuous learning and discovery. To keep improving, seek inspiration and stay open to new ideas.
- Follow Other Photographers: Follow travel photographers on social media or join photography communities to see different styles and techniques. Analyzing the work of others can inspire new approaches in your own photography. It’s always fun for me to see other photographer’s style and what they see thru the lens. Doesn’t mean it’s what you want or see - but does add a new perspective.
- Take Workshops or Courses: Investing in a photography workshop or online course can provide valuable hands-on experience and insights from professionals. For one of my birthdays my husband bought me a class with Tim Ernst and it was photographically life changing. That class was literally the kickstart of my love of nature and landscape photography and what took me to the next level.
- Review Your Work: Regularly review your photos to identify what works and what doesn’t. Constructive self-criticism is a powerful tool for improvement. Talk to people. Talk to designers. Talk to others who will give you an honest opinion. (I have some friends who will and some who won’t. I know who they are and ALWAYS go to the critical ones - because they help me improve and go to the next level.).
- Stay Curious: The world is full of beautiful and unexpected moments. Keep your camera ready, stay curious, and be willing to explore beyond the beaten path. The world is out there waiting to be explored…… go explore and make memories and have amazing experiences!!!
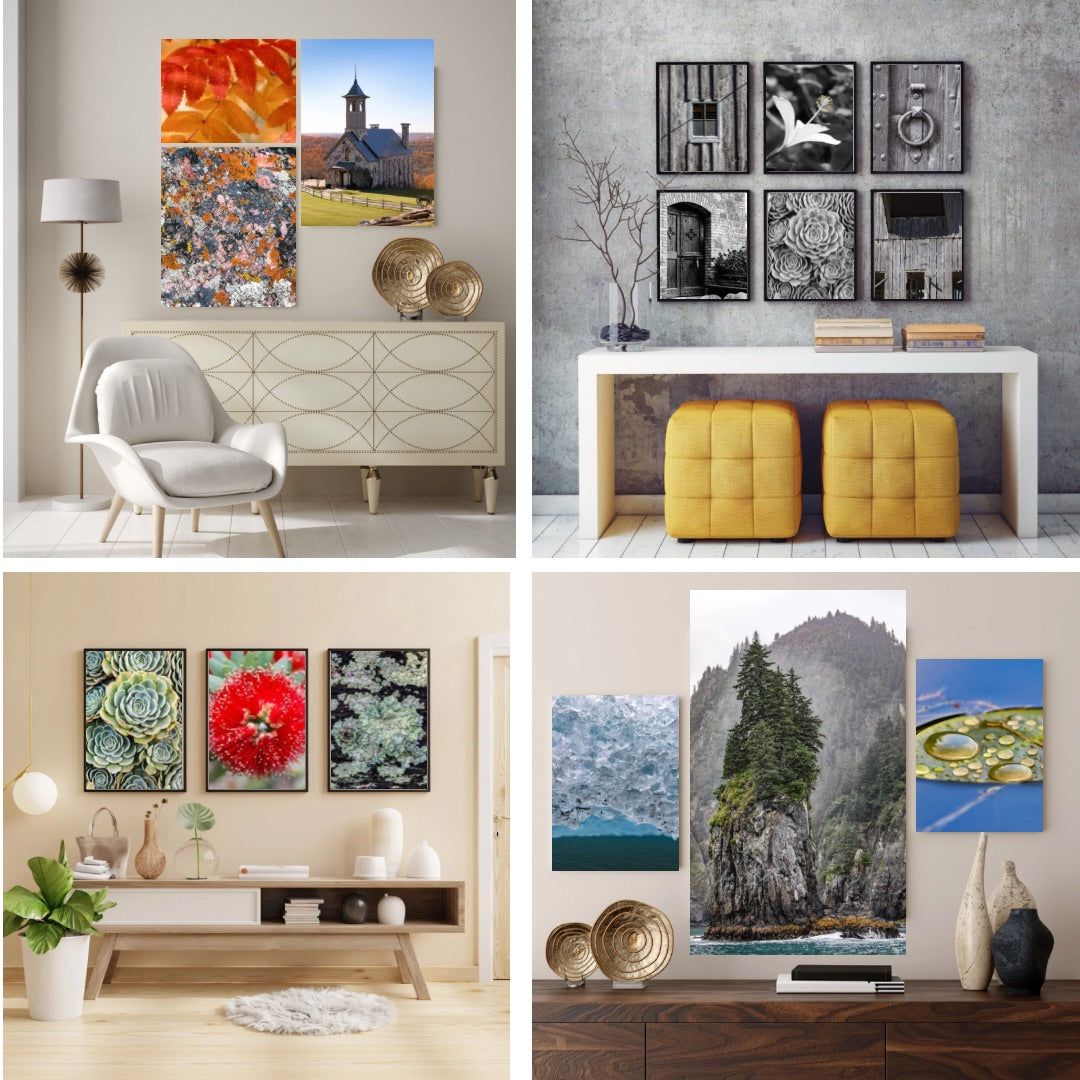
10. Creating a Visual Story
The ultimate goal of travel photography is to tell a story through your images. Think about what you want your photos to convey—whether it's the vibrant culture of a bustling market, the serene beauty of a remote landscape, or the quiet moments of daily life. I always feel like a gallery wall of those experiences is such an amazing GOAL. I have one in my house and honestly with 7 statement pieces - there is ALWAYS a conversation around them. Everyone in my family knows where they were taken, when, why, and the feelings we had going on when the picture was snapped.

- Consistency is Key: Aim for a consistent style or theme throughout your photos. This could be a particular color palette, theme, mood, or subject matter that ties your images together.
- Capture Details: Don’t just focus on the big, iconic shots. Capture the small details—the textures, colors, and little moments that make a place unique. Macro is good too!!!!
- Think in Sequences: A single photo can tell a story, but a sequence of images can create a narrative. Capture a series of shots that guide the viewer through a journey, from the wide establishing scene to close-up details.
- Emotions Matter: The best travel photos are those that evoke an emotional response. Whether it's joy, awe, curiosity, environment feelings, or nostalgia, aim to capture moments that resonate with the viewer.
Final Thoughts & Wrap Up
Travel photography is more than just taking pictures; it's about capturing the essence of a place and the experience of being there. By honing your skills, planning thoughtfully, and keeping an open mind, you can create images that tell compelling stories and evoke the emotions of your journey. Remember, the best photos often come from a genuine connection with your surroundings and the people you meet. Keep practicing, experiment with new techniques, and most importantly, enjoy the process. Each shot is a chance to see the world through a new lens and share your unique perspective with others.
Most of all …. HAVE FUN and ENJOY THE EXPERIENCE. (If you don’t get the shot - there are photographers out there who did and you can consider that your experience.)
Happy Travels! ~Lisa